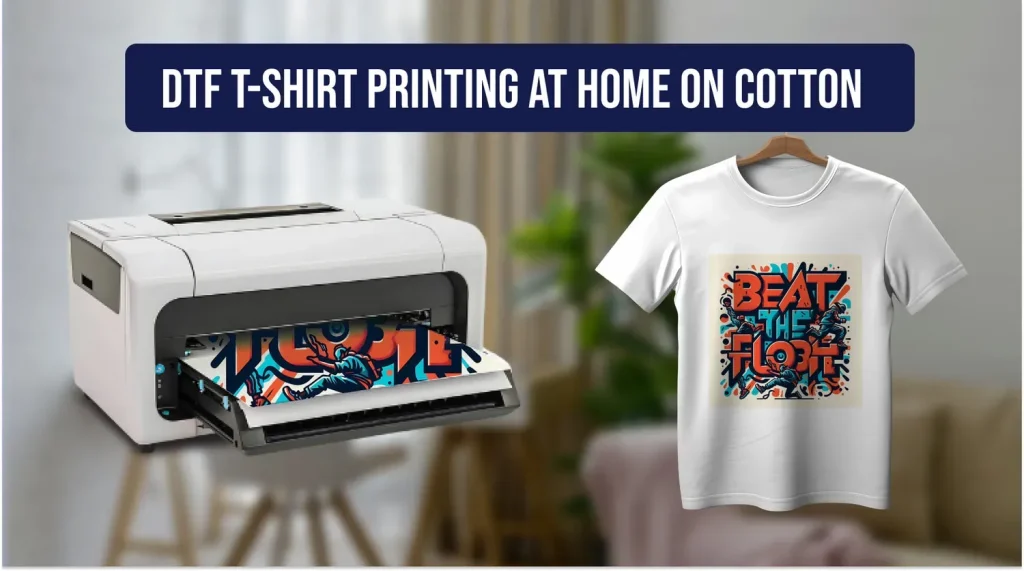
DTF printing on t-shirts has emerged as a versatile and durable method for adding vibrant designs to cotton and blended fabrics, offering a practical path from concept to wearable art for hobbyists and small shops alike, with room to scale. If you’re new to the technique or working from a home studio, this introductory guide walks you through using DTF supplies and a heat press to achieve crisp, long-lasting results, from design prep to final curing, with practical tips along the way. You’ll learn about the essential DTF supplies, including the DTF transfer film, textile-safe DTF inks, and adhesive powder, along with curing equipment and a reliable DTF printer setup, all important to color accuracy, wash-fastness, and consistent results. The tutorial emphasizes a practical workflow—from artwork prep in RGB with proper mirroring to careful curing and heat-press transfer—to help you deliver vibrant graphics that stay true through multiple washes on cotton or blends, and reduce common issues like halos or ghosting. By the end, you’ll understand how to plan, print, and finish custom tees with confidence using the DTF process and best practices for home-scale production, including optimizing design layout, color management, and safety precautions for powders and inks.
Other terms that describe this approach include direct-to-film garment decoration and film-to-fabric transfer, a method that uses a printable image on a specialized film and then bonds it to fabric with heat. Viewed this way, it relies on a coated transfer film, textile inks, and an adhesive powder that is cured to anchor the image, delivering sharp, durable graphics on tees and other apparel. Because it scales well for home studios and small shops, mastering the right film settings and heat press parameters helps ensure consistent color, adhesion, and wash resistance across different fabrics.
Choosing quality DTF supplies for vibrant, durable DTF printing on t-shirts
DTF printing on t-shirts hinges on a carefully chosen kit of supplies that work in harmony to deliver bold color and long-lasting durability. The core DTF supplies include the DTF transfer film, textile-compatible DTF inks, adhesive powder, curing equipment, and a dependable heat press. When these components are high quality and compatible, you can achieve crisp edges, smooth gradients, and strong adhesion across cotton and blended fabrics. A well-rounded setup also benefits from a clean, organized workspace and proper protective coverings to maintain consistent results.
Selecting premium DTF supplies directly impacts color vibrancy, wash-fastness, and fabric compatibility. Prioritize DTF inks formulated for textiles, a film with uniform coating properties, and a reliable adhesive powder that cures evenly. Investing in consistent consumables helps reduce variability between runs and supports repeatable results, especially when printing multiple designs or working with different garment types.
Setting up workspace and DTF printer for reliable results
Establish a dedicated printing and curing area with good ventilation, clean surfaces, and dedicated tools to prevent cross-contamination. The DTF printer setup should include properly calibrated printers, accurately configured color profiles, and environmental controls to minimize humidity and temperature fluctuations that affect ink drying.
Organize a workflow that includes a shirt platen, transfer films, and a heat press with even pressure. Use a test fabric to verify alignment and color before production runs. Maintaining a steady DTF printer setup and a clean workspace helps reduce misprints and ensures consistent finishes across batches.
Preparing artwork and color management for DTF printing on t-shirts
Begin with high-resolution artwork in RGB to preserve sharp edges after transfer. Prepare the design with appropriate margins and consider how text will scale on different garment sizes. Mirroring the image before printing is essential because the transfer will flip during the process, and clear font choices help maintain legibility on apparel.
Convert the artwork to a suitable color profile used by your printer and inks, and perform color management testing on similar fabrics. Use test prints to adjust ink density, gradients, and edge handling. Proper preparation—coupled with reliable DTF inks and transfer film—ensures your final tees match the intended color and detail.
Printing on DTF transfer film: steps from design to film
Load the DTF transfer film into the printer according to the manufacturer’s directions and use the appropriate textile-specific color profile to achieve accurate reproduction. Allow the printed film to dry completely before applying adhesive powder to avoid clumping or poor adhesion.
Spread a light, even layer of adhesive powder over the tacky print and use a dedicated shaker or applicator for uniform coverage. After powder application, shake off excess powder and proceed to curing. This sequence is critical to ensure the ink embeds correctly into the fabric during transfer and to minimize any powder residue on the garment.
Curing, adhesive powder, and the importance of proper curing in DTF
Curing the film activates the adhesive and locks the powder in place, preventing migration during transfer. Choose a curing method suitable for your setup—whether a dedicated heater, hot air oven, or conveyor dryer—and follow the adhesive powder manufacturer’s recommended temperature and duration.
Proper curing creates a stable transfer that adheres cleanly to the fabric and reduces powder fallout. Monitor the curing process carefully and verify that the adhesive has set before moving to the transfer stage. If you notice powder residue or insufficient curing, reassess temperatures, timing, and airflow, and adjust your process accordingly.
Transferring, post-care, and troubleshooting for durable DTF tees
Position the garment and transfer film with care, pre-pressing the shirt to remove moisture and wrinkles. Set your heat press to the recommended temperature (often around 160–170°C / 320–340°F) and apply firm, even pressure for the specified time (commonly 12–20 seconds). Avoid moving the film during transfer to prevent blurring or edge distortion, and perform a hot peel if required by your film, or a warm peel if advised.
Finish with a brief post-press to set the design, then let the garment cool before handling. For best results, wash the tees inside-out in cold water and avoid harsh detergents or high-heat dryer cycles during the first washes. If colors fade or halos appear, revisit the curing, color management, and film-to-fabric compatibility, using test prints to calibrate any necessary adjustments in the DTF printing process.
Frequently Asked Questions
What is DTF printing on t-shirts and how does the DTF printing process work?
DTF printing on t-shirts uses Direct-to-Film technology: you print artwork onto a DTF transfer film with DTF ink for textiles, apply adhesive powder, cure the film, and then transfer the image to fabric with a heat press. Key DTF supplies include the DTF transfer film, DTF ink for textiles, adhesive powder, a curing device, and a reliable heat press. This method delivers vibrant color, good wash-fastness, and works well on cotton and blends.
What DTF supplies do I need for reliable DTF printing on t-shirts?
Essential DTF supplies are the DTF transfer film compatible with your printer, DTF ink for textiles designed for your system, and adhesive powder suitable for DTF. You’ll also need a curing device (hot air oven or conveyor dryer) and a capable heat press, plus a shirt platen and protective sheets. Using quality DTF supplies helps achieve color vibrancy and durability across fabrics.
How should I prepare artwork for DTF printing on t-shirts to ensure sharp results?
Prepare high-resolution artwork, work in RGB for vibrant output, then convert to the printer’s color profile. Mirror the design before printing, check that it fits the garment size, and use clean, bold typography for legibility. Proper color management ensures accurate results in DTF printing on t-shirts.
What are common issues in DTF printing on t-shirts and how can I troubleshoot them?
Common issues include white halos, powder residue on fabric, blurring from movement, and color shifts. Solutions: verify proper curing of the adhesive, ensure even heat and pressure during transfer, calibrate the printer color profile, and re-test on scrap fabric.
What is the recommended workflow for curing and finishing after DTF printing on t-shirts?
After printing and applying adhesive powder, cure the film per powder guidance using a curing device, then pre-press the shirt, align the transfer, and press at the recommended temperature and time. Post-press, allow cooling and follow washing guidelines (inside-out, cold wash) to preserve the design on DTF inks for textiles.
How can a small shop optimize DTF printer setup and DTF printing on t-shirts for higher throughput?
Develop a consistent DTF printer setup and workflow for repeatable results: batch print and cure, batch transfer, and use test fabrics to dial in settings. Keep a well-organized inventory of DTF supplies, invest in reliable heat presses, and consider additional printers or color management software to scale production.
| Step | Topic | Key Points | Tools/Materials |
|---|---|---|---|
| 1. Understanding the core components | Direct-to-Film basics and essential supplies | DTF printing on t-shirts uses Direct-to-Film tech: print artwork onto a DTF transfer film, apply adhesive powder, cure, then transfer with a heat press. Key supplies include DTF transfer film, textile-compatible DTF inks, adhesive powder, curing equipment, and a reliable heat press. Quality supplies and a prepared workspace (protective coverings, clean hands) improve color vibrancy, wash-fastness, and durability. | |
| 2. Gather supplies and prepare workspace | Workspace setup and item checklist | Assemble DTF transfer film, textiles inks, adhesive powder, curing device, heat press, shirt platen or transfer sheet, test fabrics, and a ready design. Maintain a dedicated area for printing, curing, and pressing; consider a jig or vacuum stand for scale. | |
| 3. Prepare artwork for DTF printing | Artwork preparation | Start with a high-resolution design; work in RGB, convert to printer-friendly color profile; ensure fit to garment, leave a small border, use bold legible fonts, mirror the image before printing. | |
| 4. Print on transfer film and apply adhesive powder | Printing and powder application | Load film, print with proper color profile and textile settings; allow ink to dry; apply a light, even layer of adhesive powder; shake off excess powder and prepare for curing. | |
| 5. Cure the film to activate the adhesive | Curing for adhesion | Cure the printed film with appropriate equipment (heater, hot air oven, or conveyor dryer) per powder instructions to activate adhesion and prevent powder migration; ensure proper temperature and duration. | |
| 6. Prepare shirt and align transfer | Garment preparation and alignment | Pre-press the shirt briefly; position the film with printed side down; use tape or alignment tools to keep in place; center the design on the chest area. | |
| 7. Transfer the design via heat press | Transfer process | Set heat press to ~160–170°C (320–340°F); apply firm, even pressure for 12–20 seconds; avoid movement; follow film guidance for hot or warm peel; troubleshoot if edges are unclear. | |
| 8. Post-transfer care and finishing | Post-transfer finishing | Post-press the shirt briefly; cool before handling; wash inside-out in cold water; avoid harsh detergents and high heat first washes; note color variation on blends. | |
| 9. Troubleshooting common issues | Common issues and remedies | Fading colors, white halos, powder residue, and color density inconsistencies; check ink compatibility, curing, alignment, and test on scrap fabrics; adjust settings as needed. | |
| 10. Tips for consistency | Best practices for reliability | Use quality textile-specific DTF supplies; calibrate printer; test on multiple fabrics; ensure even heat and pressure with a good heat press; maintain a standardized workflow with checklists. | |
| 11. Long-term considerations & scaling | Scaling the DTF workflow | Plan for batch processing, efficient curing, and inventory management; consider larger heat presses, a second printer, and color management software; regular maintenance keeps print quality high. |
Summary
Conclusion