DTF transfers have transformed fabric printing by delivering vibrant color, broad substrate compatibility, and a straightforward workflow. This guide focuses on DTF transfer troubleshooting to help you diagnose and fix common issues affecting quality. You’ll find practical tips for addressing DTF printing issues, understanding heat press settings, and preventing misprints and color issues. We also discuss DTF film problems and how material choices impact adhesion and durability across different fabrics. By following a structured approach, you can achieve reliable results with consistent density, sharp details, and wash-fast performance.
From a terminology perspective, this fabric-decoration method is best described as a film-based digital textile transfer workflow, where artwork is printed on a PET sheet and bonded to fabric. Alternative terms such as PET film transfer, adhesive powder bonding, and heat-activated transfer convey the same idea using different naming. This LSI-aligned framing mirrors core concepts like print quality, curing, adhesion, and substrate compatibility, enabling readers to connect related topics without brand-specific language. By focusing on heat-press parameters, color management, garment prep, and post-transfer care, the guidance remains applicable across similar transfer techniques. Ultimately, the result is a durable, vibrant design that endures regular wear and washing.
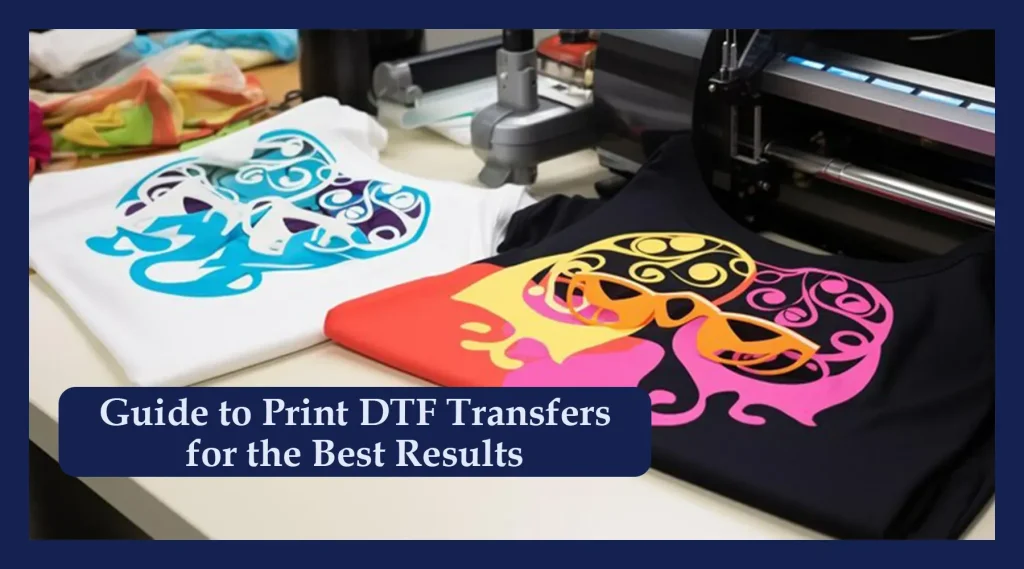
DTF transfers: essential troubleshooting workflow
DTF transfers have transformed fabric printing by offering vibrant colors, broad substrate compatibility, and a straightforward workflow. When problems arise, a structured troubleshooting workflow helps isolate variables quickly and restore consistency across jobs. This guide focuses on DTF transfers, the troubleshooting mindset, and repeatable steps you can apply across projects.
By mapping the full DTF transfer workflow—from printing on PET film with water-based pigment inks, to applying adhesive powder, curing, and pressing—you gain a practical framework for identifying where things go wrong. When any step drifts—from printer calibration to powder coverage or pressing parameters—the transfer quality can suffer, making systematic troubleshooting essential.
Common DTF printing issues and how to diagnose them
Common DTF printing issues such as misprints and color shifts can ruin a design. Start with resolving print quality by checking resolution, alignment, and color management. Ensure the artwork is prepared at 300 dpi or higher and that the printer’s alignment is precise to minimize DTF misprints and color issues.
White or missing areas, or prints that peel after transfer, usually point to powder adhesion or incomplete curing of the white ink layer. Investigate curing time, adhesive coverage, and powder layering to prevent these DTF film problems and ensure full opacity on dark or textured fabrics.
Best practices for DTF heat press settings across fabrics
Heat press settings are a major lever for success across different fabrics. Use manufacturer-recommended ranges as a baseline, typically around 300–320°F (150–160°C) for 8–12 seconds, and adjust for fabric type and film brand with DTF heat press settings guidelines.
Uniform pressure and proper dwell time help prevent density variation and edge cratering. Invest in a reliable heat press, use teflon sheets or a silicone cover, and calibrate pressure to the garment thickness to keep transfers clean across different fibers.
Addressing DTF film problems and powder adhesion challenges
DTF film problems and powder adhesion challenges start with film quality and powder consistency. Low-quality DTF film can cause uneven ink uptake, color issues, and misregistration, while inconsistent adhesive powder coverage leads to weak bonding.
Ensure powder is evenly distributed and cured per the manufacturer’s guidance. Test small batches first, watch for clumping or missing powder fields, and confirm that curing time aligns with the film and adhesive to avoid transfer failures.
Managing color accuracy with ICC profiles and color management
Managing color accuracy requires careful color management and ICC profiling. Mismatched profiles and ink bleed can cause DTF misprints and color issues, so always use the recommended ICC profile and verify color settings before printing.
Before committing to a large run, run test prints on similar fabrics, calibrate ink levels, and validate the color density with density blocks. Regular calibration helps ensure DTF transfers match the original artwork across substrates.
A practical step-by-step DTF troubleshooting checklist
A practical step-by-step DTF troubleshooting checklist helps you reproduce reliable results. Start by reproducing the problem on a controlled test fabric, then inspect the workflow order (printing, powdering, curing, pressing) and verify materials against manufacturer recommendations.
Document settings for each job and perform simple test prints on standard fabric before moving to the main project. This quick-start checklist emphasizes using approved film, powders, and inks, plus consistent pre-press, heat, and time parameters to curb DTF printing issues.
Frequently Asked Questions
What are the most common DTF printing issues during DTF transfers, and how can I troubleshoot them?
DTF printing issues often include misprints, blurry images, color shifts, white or missing areas, and peeling. Troubleshoot by: ensuring artwork is 300 dpi or higher with proper color management; verifying printer alignment and nozzle health; checking ink levels and consistency; using only recommended DTF film, adhesive powder, and inks; confirming the white ink layer cures before applying transfer powder; and test-printting on similar fabrics to isolate variables.
How can I optimize DTF heat press settings for reliable transfers across fabrics?
Start with common guidelines: 300–320°F (150–160°C) for 8–12 seconds, paired with even, consistent pressure. Adjust time and temperature based on fabric type and film brand. Pre-press to remove moisture, use a teflon sheet, and allow a brief dwell after pressing before removing the transfer. If results vary, tweak temperature or time gradually and run tests on representative fabrics.
What causes misprints and color issues in DTF transfers, and how can I fix them?
Causes include incorrect color profiles, ICC mismatches, ink density variations, and misalignment, which lead to misprints or color issues. Fixes: use the recommended ICC profile and color management workflow; verify ink levels and printer calibration; check alignment before printing; minimize heavy gradients that can cause banding; perform a small test print block on a controlled fabric to confirm density and color accuracy.
What are common DTF film problems that affect transfer quality, and how do I troubleshoot them?
DTF film problems include moisture-related adhesion issues, film folding or warping, clumping or uneven powder transfer on the film, and compatibility problems with inks. Troubleshoot by storing film in a dry environment, inspecting for wrinkles, using a consistent powder application, and curing as recommended. Ensure the film is compatible with your inks and hardware, and run a test transfer on scrap fabric to verify results.
What is a practical DTF transfer troubleshooting checklist to improve color accuracy and adhesion?
A practical checklist: verify all materials (film, inks, powder) are approved; calibrate the printer and confirm color management settings; prepare high-resolution artwork in the correct color space; ensure even powder coverage and proper curing; pre-press fabrics to remove moisture; apply transfer with correct time, temperature, and pressure; allow cooling and post-transfer curing; and follow garment washing guidelines to maintain adhesion.
How can I reduce DTF misprints and color issues when transferring to different fabrics?
Fabric variability (cotton, blends, poly) affects adhesion and color. Reduce issues by testing on fabric swatches for each type, adjusting pre-press moisture removal, heat, and pressure accordingly; use recommended film and ink settings for each substrate; maintain consistent curing times; and document successful parameters for reproducibility. Regularly verify color management and perform small test runs when switching fabrics.
| Topic | Key Points | Practical Tips |
|---|---|---|
| DTF transfer process overview | • Involves printing ink onto a PET film with water-based pigment inks; applying clingy, food-grade adhesive powder; melting the powder in a dryer or oven; placing the transfer on the garment; and applying heat and pressure to bond the design. • Each step must be properly calibrated (printer, powder coverage, drying time, pressing parameters) for reliable results. |
• Ensure correct printer calibration, film selection, powder application, and curing times to improve bonding consistency. • Verify film and adhesive compatibility before starting a job. |
| Common issues and their causes | • Misprints/blurry images: low print resolution, misalignment, poor color management; ensure artwork is 300 dpi+ and printer alignment is calibrated; watch for inconsistent ink density or wet film handling. • Color shifting/dull: incorrect color profiles, ICC mismatches, ink bleed. • White/missing areas: powder adhesion problems or incomplete curing of white ink before powdering. • Peeling/cracking after transfer: powder not cured properly or incorrect dwell time/pressure; substrate type and fabric stretch affect adhesion. • Fading after washing: insufficient curing or low-temperature settings. • Cracking/ghosting: excessive tension, too much heat, or inadequate curing time. • Wrinkling/warping: moisture in fabric/film or pre-press issues. • Uneven transfer on textured/dark fabrics: texture/color impact transfer density; use cover sheet, proper pre-press, and test prints. |
• Use the recommended color management settings and ICC profiles; verify ink levels and media settings. • Perform test prints on similar fabrics. • Calibrate printer and heat press regularly. |
| Diagnosing the root cause | • Isolate the variable causing the issue with a simple, repeatable test plan. • Reproduce the problem on a controlled test fabric (same garment type/size). • Check workflow order: printing, powdering, curing, pressing—any deviation can cause errors. • Inspect film and powder for clumping or uneven distribution and residual powder on transfer. • Verify curing and pressing settings (temperature, time, pressure) per manufacturer recommendations. |
• Use a controlled test plan and document settings to identify root causes quickly. • Maintain consistent materials and steps between tests. |
| Step-by-step troubleshooting guide | 1) Verify materials/equipment: use recommended film, adhesive powder, and inks; check nozzle health and printer maintenance; ensure heat press/teflon sheets are clean. 2) Prepare the design correctly: 300 dpi+, correct color space, proper margins. 3) Print quality and alignment: verify alignment marks; test print color blocks; look for banding/ghosting; calibrate as needed. 4) Powdering and curing: apply powder evenly; cure per manufacturer guidelines until fully set; allow cooling. 5) Preparation of garment and pre-press: pre-press to remove moisture; choose correct substrate; use teflon/parchment as needed. 6) Transfer parameters (time/temp/pressure): follow recommended heat press settings (often around 300–320°F / 150–160°C for 8–12s); apply even pressure; allow dwell time after pressing. 7) Post-transfer care: let garment cool completely; cure further on fabric; follow washing guidelines (inside-out, cold wash, air-dry if possible). |
• Document and follow a repeatable protocol for each job. • Run small tests before larger runs to confirm results. |
| Best practices to prevent common issues | • Use recommended settings and test sheets from suppliers; consistency is key. • Maintain a controlled environment (humidity/temperature). • Regularly calibrate printer and heat press; log settings for each job. • Pre-press and moisture management reduce bonding issues. • Store materials properly (avoid moisture and sunlight). |
|
| Materials and equipment considerations | • Film quality matters; low-quality film can cause poor ink uptake and color issues. • Adhesive powder consistency matters (uniform particle size and coverage). • Inks: water-based pigment inks vs dye-based inks; use the recommended ink system. • Substrate compatibility is essential; some fabrics may need different times/pressures for best adhesion. |
• Use compatible materials per your workflow guidelines; run quality tests for new materials. |
| Common mistakes to avoid | • Skipping pre-press or failing to remove moisture from fabrics. • Over- or under-curing; improper powder application. • Using the wrong color profile or failing to correct color management for the film. • Rushing the transfer process and applying inconsistent pressure. |
• Always pre-press; check cure times; verify color management for the film; take time to ensure even pressure. |
| When to seek professional help | • If repeated attempts fail to yield consistent results after thorough troubleshooting, consult material suppliers or equipment manufacturers. • A pro can help verify printer calibration, cure times, and heat-press parameters aligned with specific film and adhesives. |
• Reach out to the supplier/manufacturer for guidance and calibration support. |
| Quick-start checklist for reliable results | • Confirm approved DTF film, adhesive powder, and inks. • Calibrate the printer and verify color management settings. • Prepare artwork at high resolution and in the correct color space. • Ensure consistent powder coverage and proper curing. • Pre-press fabrics and apply even, appropriate heat and pressure. • Test a small batch before large runs. |
• Use a pre-job checklist to maintain consistency across projects. |
| Conclusion | DTF transfers provide a powerful, flexible path to vibrant, durable prints, but they require careful attention to every step of the process. This guide outlines the DTF transfer workflow, common issues, and a structured troubleshooting approach to help you achieve consistent, high-quality results across a wide range of fabrics. By following the recommended steps, calibrations, and best practices, you can reduce repeat issues, improve adhesion, and enjoy reliable DTF transfers that stand up to washing and wear. |
Summary
Conclusion: DTF transfers provide a powerful, flexible path to vibrant, durable prints, but they require careful attention to every step of the process. This guide outlines the DTF transfer workflow, common issues, and a structured troubleshooting approach to help you achieve consistent, high-quality results across a wide range of fabrics. By following the recommended steps, calibrations, and best practices, you can reduce repeat issues, improve adhesion, and enjoy reliable DTF transfers that stand up to washing and wear.