DIY UV DTF Transfer opens up a practical, fun way to move custom designs onto fabrics with professional-looking results. This guide walks you through the complete journey—from a clean design file to a finished product you can wear, sell, or gift. Whether you’re tweaking a single T-shirt design or producing small batches, understanding the essentials of DIY UV DTF Transfer helps you achieve vibrant colors, durable adherence, and repeatable results. By focusing on the DIY approach, you’ll gain confidence with your design file for DTF transfers, printer setup, heat press settings for UV DTF, and finishing steps that make the transfer last. If you run into common issues, a little troubleshooting UV DTF transfers knowledge can save time and improve outcomes.
In broader terms, the UV DTF transfer process blends UV-curable inks on a specialty film with an adhesive powder to yield crisp images on textiles. From a modern web-facing perspective, think of it as a home-friendly design workflow where a clean file and careful heat application drive consistent results. When issues arise, use troubleshooting UV DTF transfers as a structured guide to adjust alignment, material, and cure times for different fabrics.
Understanding DIY UV DTF Transfer: Definition, Benefits, and Use Cases
DIY UV DTF Transfer is a modern decorative technique that uses UV-curable inks printed onto a specialty transfer film. After printing, an adhesive powder is added and cured, creating a bond that transfers to fabrics or other substrates when heat is applied. This approach aims for crisp edges, smooth gradients, and a durable finish that withstands washing. By combining digital design with a controlled curing process, makers can achieve professional-looking results without large runs or costly setups.
Because the method works across a variety of fabrics and substrates, it’s well-suited for personalized tees, bags, and home decor. The workflow emphasizes controllable color reproduction, repeatable results, and a relatively compact workspace. If you’re experimenting with DIY UV DTF transfer, you’ll appreciate how a well-prepared design file for DTF transfers affects alignment, color accuracy, and overall print quality.
Designing for DTF: Crafting a Design File for DTF Transfers
Design file for DTF transfers should be prepared at high resolution, typically 300-600 dpi for raster images or scalable vector formats for line art. Clean edges, proper bleed, and accurate margins help ensure the transfer sits correctly on your final product. Color management is critical when using UV-curable inks, so plan for white underlays or separations if you’re printing on dark fabrics.
Before printing, organize your layers and consider color separations so that opacity and layering align with the transfer film. Inversion and layout steps may be required depending on the press and film, and alignment marks help you reproduce the same placement across multiple items. Saving versions with precise bleed and trim information keeps your project ready for production.
From Print to Substrate: The UV DTF Transfer Process Explained
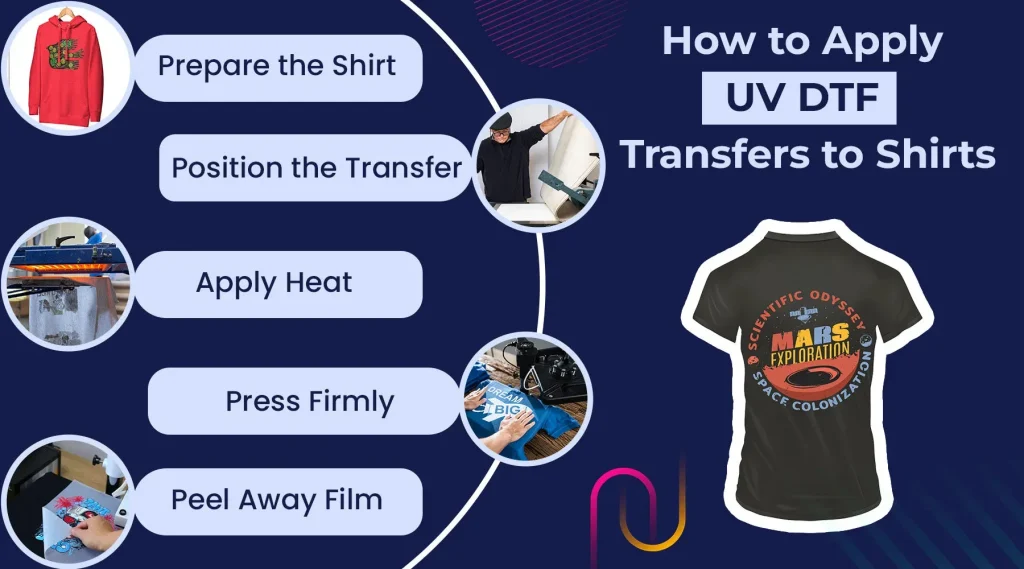
The UV DTF transfer process starts with printing the image on a UV-curable ink compatible transfer film. After printing, the ink is cured or fixed, and an adhesive powder is applied to the film. The coated film is then heated to fix the powder, creating a ready-to-transfer sheet. When heat and pressure are applied to the target substrate, the image adheres, yielding sharp detail and solid color coverage.
Choosing the right transfer film and adhesive powder affects color density and wash-fastness. Some workflows require a white base layer to enhance opacity on dark fabrics, followed by color layers. Plan drying and curing times between steps to prevent smudging, and ensure you have a clean surface for alignment before the final press.
Achieving Consistent Color: Heat Press Settings for UV DTF and Substrate Prep
Heat press settings for UV DTF should be chosen with the substrate and adhesive in mind. A typical starting point is around 160-170°C (320-338°F) for 15-20 seconds with moderate, even pressure. Use a silicone mat to protect the platen, and perform a test piece to confirm color density and edge sharpness before committing to a larger run.
Substrate preparation and pressure control are essential for consistent results. Pre-wash fabrics to remove finishes that could hinder adhesion, and use precise alignment methods to avoid misregistration. After pressing, decide whether to perform a hot peel or a warm/cold peel, as this choice can influence the final look and durability. Document the results for future projects.
DIY DTF Transfers at Home: Tools, Setup, and Safe Handling
DIY DTF transfers at home are feasible with a focused setup: a UV printer or compatible printer, UV DTF transfer film, adhesive powder, a heat press, and a few basic tools for alignment and finishing. This workflow supports small batches and bespoke designs, enabling you to produce customized apparel, bags, or home decor.
Create a dedicated workspace that minimizes dust and moisture, and store films and powders in a cool, dry place. Develop a routine for file organization, printer calibration, and heat-press timing so you can reliably reproduce your results. When handling hot items, wear protective gear and maintain a clean, labeled environment for finishing steps and curing.
Troubleshooting UV DTF Transfers: Common Issues and Practical Fixes
Troubleshooting UV DTF transfers involves diagnosing issues such as color muddiness, edge blur, ghosting, or uneven adhesion. Start by verifying color profiles, printer calibration, and film alignment, then run a color test strip to compare against reference swatches. Small adjustments in the printing order or drying times can make a big difference.
Other common fixes include ensuring complete powder coverage, re-curing the adhesive, and re-pressing problem areas. If you see ghosting or double images, stabilize the transfer with a jig or cover sheet to prevent movement during pressing. Keep a log of settings for each project to improve reproducibility and reduce troubleshooting time in future runs, aligning with best practices for troubleshooting UV DTF transfers.
Frequently Asked Questions
What is DIY UV DTF Transfer and how does the UV DTF transfer process work?
DIY UV DTF Transfer is a method that uses UV-curable inks printed onto a transfer film, which is then bonded to fabric via heat and an adhesive powder. The UV DTF transfer process typically involves preparing a clean design file, printing the image on transfer film, curing or fixing the ink, applying adhesive powder, curing the powder, aligning on the substrate, and heat pressing to complete the transfer. This approach yields crisp details, smooth gradients, and a durable bond that withstands washing. Key steps to master include design file readiness, printer setup, heat press parameters, and proper finishing.
How do I prepare a design file for DTF transfers for DIY UV DTF Transfer?
Prepare a high-resolution design file (300-600 dpi for raster, or vector). Manage color with appropriate profiles; if you plan white ink, separate layers. Invert and layout for final size, add bleed and margins, save as PNG, TIFF, or PDF to ensure compatibility with transfer film.
What are the ideal heat press settings for UV DTF and how can I dial in the heat press settings for UV DTF?
Typical settings are around 160-170°C (320-338°F) for 15-20 seconds with moderate pressure. Adjustments may be needed based on substrate and adhesive; always run a test piece. Follow your transfer film and adhesive manufacturer recommendations for peeling (hot or warm) and any post-press curing.
Can I do DIY DTF transfers at home, and what basic setup do I need?
Yes, you can do DIY DTF transfers at home with a suitable setup: a UV printer with UV-curable inks, UV DTF transfer film, adhesive powder, a heat press, protective gear, design software, and testing swatches. Create a dedicated workspace, keep a clean environment, and establish a repeatable workflow for consistent results.
What are common troubleshooting steps for UV DTF transfers and how can I troubleshoot UV DTF transfers effectively?
Common issues and fixes include color muddiness (recalibrate printer, use color test strips), edge blur (ensure even pressure and proper film alignment), uneven adhesion (check adhesive coverage and cure), ghosting (prevent film shift with a stable jig), residue on fabric (verify peeling method and film cleanliness), and reproducibility (document and repeat your workflow precisely).
How can I optimize the workflow for DIY UV DTF Transfer to ensure consistency and durability, including design file for DTF transfers and heat press settings for UV DTF?
To optimize, use a repeatable workflow: work on clean, prepped substrates; document every setting (printer profile, ink density, adhesive powder, heat press temp/time/pressure); run scrap tests before final production; store transfer films properly. For design file for DTF transfers, ensure proper resolution, color separations, and alignment marks. For heat press, follow the recommended temperatures and times for your adhesive and film to create a consistent, durable finish.
| Aspect | Key Points | Notes |
|---|---|---|
| Overview of DIY UV DTF Transfer | A practical method to move designs onto fabrics/substrates using UV-curable inks on transfer film; adhesive powder bonds the design with heat. | Aims for crisp details, smooth gradients, durable wash-fastness; better durability than traditional iron-ons. |
| What it is (process) | Print on transfer film with UV-curable inks, cure/fix ink, apply adhesive powder, press onto substrate with heat. | Focus on precision, color fidelity, and a strong bond at the textile surface. |
| Why choose DIY UV DTF Transfer? | Benefits include small-run flexibility, ability to reproduce intricate artwork, fabric compatibility, and cost efficiency for home-based creators. | Great for hobbyists and small businesses aiming for professional results. |
| Getting Started: Materials & Setup | Design software, UV transfer film with adhesive, UV printer, heat press, weeding tools, substrates/testing swatches. | Set up a repeatable workflow with a check-list and protection for handling heat. |
| Design File Prep | Resolution 300-600 dpi, color management; consider white ink underlay if needed; inversion/layout and margins/bleed. | Plan for color opacity on dark fabrics and precise final size. |
| Printing onto DTF Film | Calibrate printer for accurate color; use UV-curable inks; consider a white base layer for opacity; ensure proper drying/curing; apply and cure adhesive powder. | Avoid smudging; verify adhesion before transferring. |
| Heat Press & Transfer | Prepare substrate, align transfer, heat-press at around 160-170°C (320-338°F) for 15-20s with moderate pressure; peeling method and post-press care; optional post-transfer cure. | Temperature/time vary by material; perform test piece. |
| Troubleshooting & Tips | Common issues like color muddiness, edge blur, uneven adhesion, ghosting, or residue; refer to color profiles, calibration, film alignment. | Use test strips, stabilize the process, re-press or re-apply powder as needed. |
| Best Practices | Clean, pre-washed substrates; controlled environment; document printer/adhesive/press settings; practice on scraps; protect workflow. | Leads to consistent, repeatable results across batches. |
Summary
DIY UV DTF Transfer empowers creators to bring intricate designs to life with a level of control and customization that suits small batches and bespoke projects. By starting with a strong design file for DTF transfers, choosing the right adhesive and transfer film, and dialing in heat press settings for UV DTF, you can achieve durable, vibrant results that stand up to wear and washing. Practice, patience, and careful documentation will steadily improve your outcomes, turning a promising idea into a reliable, high-quality finished product. Whether you’re making custom apparel, bags, or home decor, the DIY UV DTF Transfer technique offers a versatile path from design file to finished product that can scale with your creativity and business goals.