DTF transfers have transformed custom apparel by offering vibrant designs with strong durability and broad fabric compatibility. As more brands adopt Direct-To-Film methods, mastering the essentials: DTF printing tips, file preparation, and finishing drives consistently high-quality prints. This guide explores practical steps for designing, preparing files, and finishing your transfers so you can optimize every phase of the workflow. By focusing on edge clarity, color management, and fabric readiness, you’ll deliver results that look sharp, feel soft, and endure repeated washes. Whether you’re new to this technology or refining your process, the goal is reliable, vibrant results that stand up to wear.
Beyond the initials DTF, this approach uses a film-based process that carries inks to a garment via heat and pressure. Think of it as direct-to-film decoration, where an adhesive-coated, pigment-filled sheet is placed onto fabric and cured with a controlled press. By framing the workflow around file setup, color management, and finishing from a film-first perspective, designers can anticipate how artwork translates across textures. Direct-to-film printing, heat transfer film, pigment inks, and substrate compatibility across fabrics are commonly discussed terms that help teams align on quality and consistency.
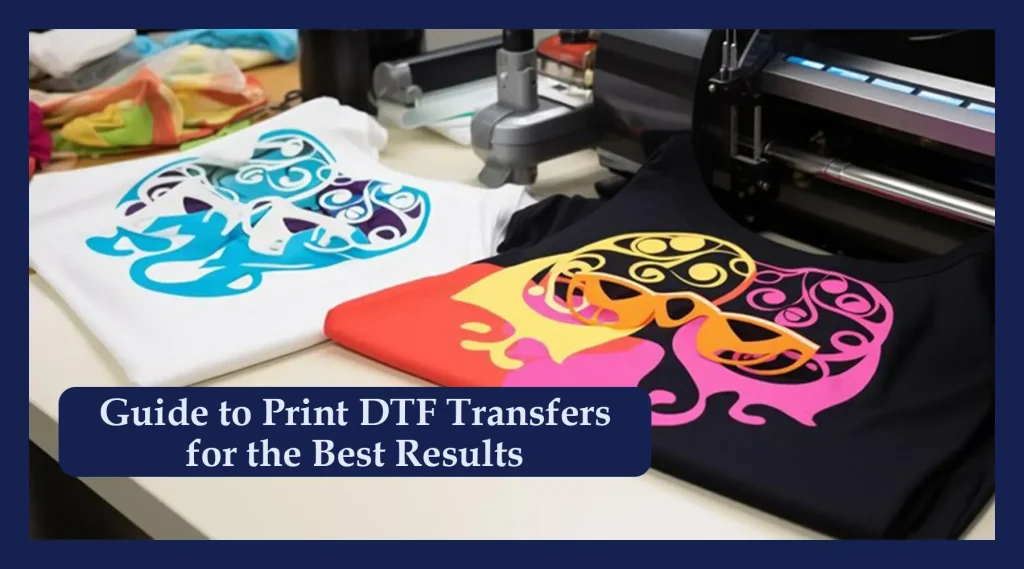
DTF Printing Tips for Vibrant, Durable Garments
Direct-to-film transfers rely on precise prep to achieve vibrant color, strong adhesion, and wash durability. Implementing DTF printing tips such as color-managed workflows, calibrated proofs, and a clean production environment helps you reproduce expected results consistently. By establishing a repeatable process, you minimize color shifts and ink misalignment from batch to batch.
Designs should be prepared at 300–600 dpi at final print size, with vector elements kept as vectors and rasters sharpened appropriately. Always perform a test print on a fabric swatch to verify color, white underbase coverage, and edge fidelity before committing to the full batch. This proactive approach saves time and materials while raising overall print quality.
Designing for DTF Transfer Design: From Concept to Layering
DTF transfer design requires anticipating how film-to-fabric changes affect edges, textures, and opacity. Plan for a solid white underbase on dark fabrics and ensure your artwork accounts for slight shifts during transfer. Thoughtful planning helps you maintain edge clarity and texture integrity in the final print.
Organize files with clearly named color layers (C, M, Y, K, White) and keep typography as vector. Build in bleed margins and safe zones so critical elements stay clear after trimming and transfer. By aligning design intent with the physical realities of heat and pressure, you’ll reduce rework and improve consistency.
Achieving High-Quality Prints with DTF Across Fabrics
High-quality prints with DTF rely on consistent ink deposition and fabric interaction. Test across cotton, poly blends, and performance fabrics to understand pigment adhesion and color vibrancy. This exploration helps you tailor the workflow to each substrate category and avoid surprising results.
Pair pigment inks with appropriate pre-treatment when required and adjust curing time to preserve softness and hand feel while maintaining opacity. Consider fabric texture and weave when choosing the film and adhesive, and use test runs to validate that the final texture remains pleasant to the touch without sacrificing durability.
Substrate Compatibility for DTF: Fabrics, Textures, and Prep
DTF transfers offer broad substrate compatibility for fabrics from smooth cotton to brushed polyester, but performance varies with fiber content and weave. Understanding how different substrates interact with ink and adhesive helps you benchmark expectations and plan for pre-treatment where necessary. This awareness guides material selection and ensures consistent results across product lines.
Consider pre-treatment needs, fabric texture, and post-press care to maximize durability; test on representative swatches to confirm adhesion, opacity, and feel. Document fabric types and outcomes so future projects can reuse proven settings, reducing guesswork and waste while maintaining a high standard of finish.
Streamlining the DTF Transfer Workflow: File Prep, Color Management, and Press Parameters
Efficient file prep and color management are essential to a smooth DTF workflow. Establish a dedicated DTF folder with clearly labeled color layers and maintain ICC profiles to minimize color shifts between proof and print. This discipline supports repeatable results across runs and reduces last-minute adjustments.
Set press parameters to known-good ranges—commonly around 160–170°C (320–340°F) with a 12–15 second dwell time—plus a quick pre-press to remove moisture. Conduct a test run on similar fabric before full production, verifying adhesion, color density, and overall hand feel to prevent batch-wide issues.
Quality Control and Troubleshooting for Reliable DTF Transfers
Quality control should verify registration, color accuracy, and edge sharpness before scaling to full production. Use alignment marks and sample swatches to catch issues early, and document results to refine each parameter for future projects. A disciplined QC routine reduces waste and elevates overall consistency.
If problems arise—ghosting, ink bleed, or dull colors—revisit color management workflows, underbase thickness, and substrate preparation. Keep a troubleshooting log that links observed faults to action steps, enabling rapid iteration and steady improvement across batches.
Frequently Asked Questions
What are essential DTF printing tips to achieve high-quality prints with DTF transfers across different fabrics?
Start with solid design prep and file setup: work at 300–600 dpi for final size, keep vector elements as vectors, and use a color-managed workflow (CMYK + White) with ICC profiles. Print test swatches on fabrics similar to your target to anticipate ink behavior and color shifts. Verify substrate compatibility for DTF by matching film, adhesive, and powder to the garment type, and plan white underbase and edge details to ensure opacity and sharpness on both light and dark fabrics.
How should I approach DTF transfer design to ensure edge clarity and color accuracy for high-quality prints with DTF?
DTF transfer design should account for how artwork shifts from film to fabric. Build in bleed, margins, and safe zones, and place white ink strategically as an underbase to support color vibrancy on dark textiles. Keep lines crisp by using vector text and clear separations, and rasterize complex gradients at 300 dpi or higher. Use color-managed proofs to predict on-textile appearance and align the design with substrate textures for consistent results.
What impact does white underbase have on DTF transfers and what are the recommended DTF printing tips to optimize opacity without sacrificing softness?
White underbase is often essential for opacity on darker fabrics. DTF printing tips suggest testing multiple underbase thicknesses to balance color brightness with fabric hand-feel. Start with a moderate white underbase, ensuring it sits beneath colors to maintain opacity without stiffening the print, and use test prints to determine the best thickness for your fabric. Adjust based on the garment and film behavior to keep prints vibrant yet soft.
Which fabrics or substrates offer the best Substrate compatibility for DTF, and how do you select films and pre-treatments accordingly?
Substrate compatibility for DTF is broad but varies by fabric type and texture. Smooth cotton and polyester blends typically yield vibrant, clean results, while brushed or textured fabrics may require extra color management or light pre-treatments. Choose transfer film, adhesive, and powder suited to the garment, and always validate on similar material before full production. Consider fabric pre-treatment guidelines from manufacturers to optimize adhesion and wash durability.
What are common troubleshooting steps in DTF transfers, and how can applying DTF transfer design and printing tips prevent issues like ghosting or color shifts?
Common issues include misregistration, color shifts, and ghosting. Apply DTF transfer design and printing tips by running alignment checks with test prints, maintaining consistent platen pressure, and verifying color proofs on the target fabric. If colors look dull, revisit color profiles, underbase strategy, and white ink opacity, making small adjustments to layer order and opacity. Ensure complete curing and remove any residual film to prevent ghosting.
What finishing, curing, and care considerations help preserve DTF transfers for long-lasting results?
Finish with proper curing and cooling, then provide care instructions to protect prints. Advise cold-water washes, gentle cycles, and air drying to preserve the hand feel and color integrity. Include clear post-press care guidelines on heat exposure and washing frequency to extend life, ensuring that high-quality prints with DTF endure many washes and maintain vibrant appearance across substrates.
| Aspect | Key Points |
|---|---|
| What DTF transfers are | Film-based transfers carrying pigment inks with adhesive; the final print sits on the garment via heat and pressure, allowing vibrant color reproduction and broad fabric compatibility. |
| Design foundations | Plan for the target garment, ensure edge clarity, color depth, and texture translation. Consider white underbase on dark fabrics. Use high-quality files (300–600 dpi); keep vector elements crisp. |
| Artwork preparation | Organize layers (CMYK + White), label clearly, use lossless formats, preserve transparency, include bleed and safe margins. |
| Printing workflow | Conduct test prints to verify color, white underbase, and alignment. Calibrate white underbase, choose appropriate substrate/film, and run heat press at about 160–170°C (320–340°F) for 12–15 seconds with firm pressure; follow with proper curing and cooling. |
| Substrates & finishing | Fabric type affects ink coverage; some fabrics need pre-treatment. Choose adhesive/film matched to the garment and advise on care to extend print life. |
| Quality control & troubleshooting | Check alignment, color accuracy, and edge sharpness. Monitor white ink behavior; address ghosting, bleeds, and dull colors with test prints and workflow adjustments. |
| Advanced tips | Layered textures, batch consistency, throughput optimization, and sustainability considerations for seasoned creators. |
Summary
DTF transfers empower apparel creators by combining vibrant, durable prints with wide fabric compatibility. Mastering design, file preparation, and printing process steps enables you to deliver prints that are sharp, soft to the touch, and wash well. Continuously testing, measuring results on target fabrics, and refining your workflow will help you elevate your DTF transfers to consistently high-quality levels.