DTF transfers have revolutionized custom apparel, offering vibrant designs with durable adhesion and a surprisingly straightforward workflow. From DTF printer settings to the precise DTF transfer temperature, mastering the basics lays the foundation for consistent, professional results. Understanding DTF press time and the right DTF transfer tools helps ensure your designs peel cleanly and endure repeated washes. In this guide, we’ll walk through printing DTF transfers like a pro, with clear steps for tools, timing, and temperature that translate into reliable results. Whether you’re new to DTF or upgrading your setup, these fundamentals apply across fabrics and keep your finishes bold and durable.
Viewed through a different lens, this is a film-based, heat-activated method for decorating fabrics. You’ll hear it described as direct-to-film embellishment or heat-transfer graphics, both of which highlight a printable film, adhesive powder, and textile adhesion. The success hinges on careful calibration of temperature, pressure, and dwell time to maintain color, sharp edges, and wash durability. In practical terms, this approach is a contemporary alternative to traditional screen printing, offering quick setup and flexible runs for small batches.
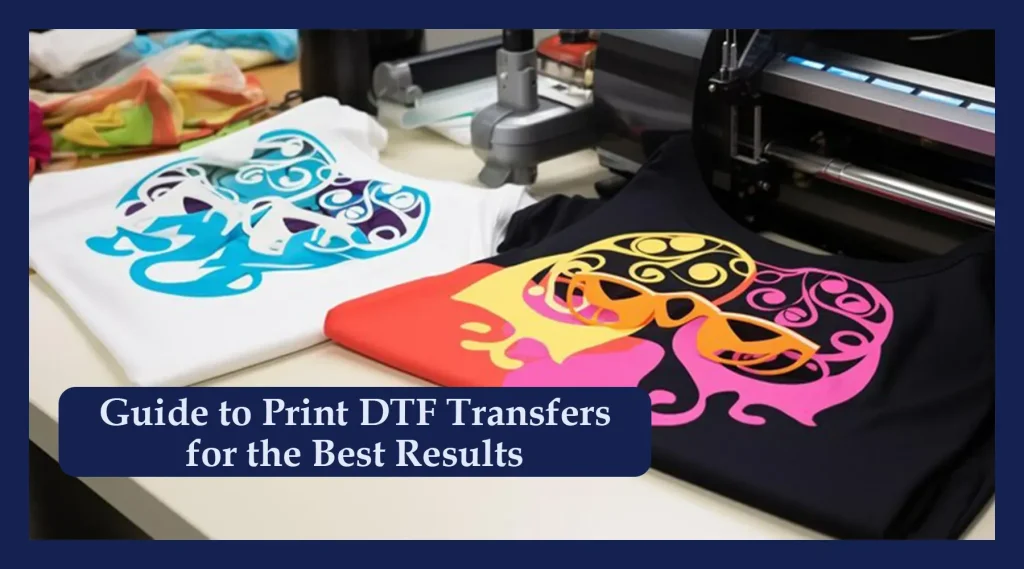
From Design to Durable Adhesion: Understanding DTF Transfers
DTF transfers, short for Direct-to-Film, layer vibrant designs onto textiles through printed ink on a PET film and a heat-activated adhesive powder. This approach delivers flexible, durable graphics with good color fidelity when you manage the printing and pressing steps carefully. Getting started hinges on knowing the workflow—from artwork prep to the final press.
To achieve repeatable results, align your tools, timing, and temperature. The three fundamentals—the right tools, precise time, and correct temperature—also hinge on understanding DTF printer settings and how they interact with the transfer film and adhesive powder. By tracking how DTF transfer temperature and dwell time affect adhesion, you can push consistency across batches.
Must-Have DTF Transfer Tools for Consistent Results
Equip yourself with a reliable heat press (15×15 to 16×20), a non-stick barrier like a Teflon sheet, parchment or silicone sheets, and a lint-free workflow to reduce debris on the garment. Add tools such as heat-resistant tape, silicone mats, protective garments, and tweezers to ensure precise alignment. These DTF transfer tools form the backbone of a repeatable process.
With the right toolkit, you can standardize steps from alignment to cure. A stable workspace and consistent environment minimize variability across runs. Document your base settings—DTF printer settings, pressure, and time—so you can reproduce success and quickly troubleshoot when something shifts.
Optimizing Temperature and Time for Perfect Adherence
Baseline is often around 315–325°F (157–163°C) with a 12–20 second dwell, but fabric type and ink/powder chemistry can shift this range. The DTF transfer temperature and dwell time work together to melt the adhesive and lock the design into fibers. Start conservative and test on swatches to avoid scorching or color shifts.
Include a brief pre-press step (3–5 seconds) to remove moisture and set the surface, then use a warm or hot-peel approach for best edge definition. Understanding DTF press time in relation to fabric weight helps tailor settings for cotton, blends, or synthetics without compromising durability. Keep notes on results to refine your DTF printer settings over time.
Printing DTF Transfers: From Artwork to PET Film and Powder
Prepare your artwork with proper color space (sRGB is common) and mirror the image if required by your printer; ensure the artwork matches garment dimensions before printing onto the PET film. Printing DTF transfers combines design, printer output, and a PET film carrier, so attention to color accuracy and layout is essential for a sharp result.
After printing, apply adhesive powder evenly and cure per powder specifications to lock the powder onto the film before heat pressing. The transfer film then carries your design to the garment, with a barrier sheet helping protect the press and maintain crisp edges.
A Repeatable Workflow for DTF Transfers: Calibration and Color Management
Regular calibration of the printer ensures color accuracy and consistent density across runs. Track ink saturation and adjust DTF printer settings to maintain faithful color reproduction, especially on dark or bright designs. Color management becomes the backbone of reliable transfers from batch to batch.
Run test prints on scrap garments first and document the exact temperature, time, and pressure that yielded the best adhesion. Use those notes to build a standard operating procedure so every future print follows the same path, aligned with your DTF transfer temperature targets and printer profile.
Troubleshooting and Post-Press Care for Long-Lasting DTF Results
When issues appear—white edges, dull color, or edge ghosting—adjust temperature incrementally, verify powder curing, and ensure you’re pressing long enough for complete adhesion. Check barrier sheets, platen cleanliness, and fabric compatibility, and consider pre-treatment for challenging fabrics.
Post-press care extends durability: allow curing on the garment, then wash with cold to warm water and gentle detergents, avoiding harsh bleaches. Document care guidelines and educate users on proper washing to maximize the life of DTF transfers, ensuring long-lasting results.
Frequently Asked Questions
What are the essential DTF printer settings for successful DTF transfers?
Optimal DTF printer settings start with accurate color profiles and resolution (often sRGB), correct mirroring if required, and consistent ink density. Calibrate the printer, verify the carrier film and adhesive powder compatibility, perform nozzle checks, and test on a scrap piece to lock in repeatable results for DTF transfers.
How should I set the DTF transfer temperature for different fabrics?
Begin with a safe baseline of 315–325°F (157–163°C) and adjust toward 330–335°F (166–168°C) for heavier fabrics or challenging inks. Always test on a similar fabric swatch and consider fabric type (cotton, polyester, blends) and the specific ink/powder formulation when dialing in DTF transfers.
What is the recommended DTF press time for common fabrics?
A typical dwell time is 12–20 seconds. Shorten for lighter fabrics and lengthen slightly for heavier fabrics or denser powders, and include a brief 3–5 second pre-press to remove moisture and ensure even contact.
Which DTF transfer tools are essential for consistent printing DTF transfers?
A reliable heat press, non-stick barrier sheets, PET transfer film, adhesive powder, lint-free cloth or roller, heat-resistant tape, silicone mats or pillows, and protective gloves form a practical setup that supports accurate alignment and uniform heat for DTF transfers.
What are common issues with DTF transfers and how can I adjust DTF transfer temperature or printer settings to fix them?
Common issues like white edges, poor adhesion, or color shifts usually point to inconsistent heat, incomplete powder curing, or improper calibration. Incrementally adjust DTF transfer temperature and printer settings, verify dwell time and pressure, and always run a test on a scrap garment before mass runs.
How can I optimize the workflow for printing DTF transfers from design to press?
Plan with a clear workflow: design with correct color profiles, print DTF transfers on PET film, apply adhesive powder and cure per powder specs, pre-press garments (3–5 seconds), align the transfer, press at 315–325°F for 12–20 seconds with medium pressure, peel warm, and allow curing before handling.
| Key Point | Summary |
|---|---|
| What is a DTF transfer? | DTF stands for Direct-to-Film. The design is printed on a PET film using disperse inks, dusted with adhesive powder, and fused with heat. The result is a flexible, vibrant transfer that adheres to textiles when heated; correct temperature, time, and pressure impact adhesion, color fidelity, and longevity. |
| Essential tools | A practical setup for hobbyists/small shops: heat press (15″×15″–16″×20″), non-stick sheets, parchment/silicone sheets, lint roller, heat‑resistant tape, silicone mats/press pillows, transfer film/PET film, gloves and heat-safe workstation, alignment aids (tweezers/magnetic pads), garment safeguards. |
| Temperature and time | Temperature: 315–325°F (157–163°C) as a safe starting point; up to 330–335°F (166–168°C) for some fabrics, testing on swatches is advised. Time: 12–20 seconds; pressure: medium to firm; pre-press: 3–5 seconds; peel: warm/hot (not scorching). Embed considerations for edge definition and adhesion. |
| Step-by-step workflow | 1) Prepare design/film (correct color profile, mirror if needed); 2) Print and apply adhesive powder (cure per powder specs); 3) Pre-press garment 3–5 seconds; 4) Align and secure transfer; 5) Press at 315–325°F for 12–20 seconds with medium–firm pressure; 6) Peel warm; 7) Post-press curing per garment care guidelines. |
| Best practices | Choose high-quality PET film and compatible powders; calibrate printer/color management; run test raises for baseline; consider fabric type differences; protect edges/corners with barrier sheets; keep press platen clean to avoid residue. |
| Troubleshooting | White edges/poor adhesion: increase heat or dwell slightly; cracking/peeling after washing: check adhesion and post-care; color shift/dull whites: calibrate color profiles; bleeding on dark fabrics: reduce ink density/increase pressure; ghosting on seams: use solid pressing surface or a pillow. |
| FAQs | Q: Can I use the same heat-press settings for all fabrics? A: Start with 315–325°F, 12–20 seconds, medium pressure, then adjust per fabric. Q: Peel hot or cold? A: Warm/hot peel is commonly recommended for clean edge definition. Q: How long do DTF transfers last? A: With proper adhesion and care, they withstand many wash cycles when cared for properly. |