DTF transfers have transformed garment customization, delivering vibrant, durable graphics that stay sharp wash after wash, and they open new creative possibilities for brands, makers, and small studios seeking to differentiate their apparel through durable, color-rich designs that withstand daily wear and regular laundering. This introductory guide focuses on practical, real-world steps to achieve consistent results across a range of fabrics—from lightweight cottons and blends to heavier fleece and jersey—while outlining common pitfalls and simple, repeatable quality checks that help you scale from single pieces to small production runs. In particular, DTF transfers for hoodies and tees illustrate how careful artwork preparation, correct film handling, material choice, and garment texture influence color depth, gradient smoothness, edge crispness, stretch behavior, and overall longevity of the final print under daily use. For a structured path, explore the DTF printing guide and the clear steps on how to apply DTF transfers, from precise file setup and color management to curing the adhesive on the film and executing a dependable press, with notes on timing, pressure, and post-press handling. To optimize outcomes, we also cover heat press temperatures for DTF and practical tips to troubleshoot and refine adhesion, curling, and wash-fastness across different garment types, accompanied by a reusable checklist you can adapt for new projects or batch runs.
From an LSI perspective, the topic can be framed as a digital-to-fabric transfer workflow that uses a film-based process to embed designs into textiles. Think of it as a modern garment decoration method that combines color-rich films, adhesive powders, and heat to fuse artwork with fabrics while preserving stretch and drape. Exploring related concepts such as printer profiles, substrate compatibility, and color management helps predict outcomes and maintain consistency across different fabrics and textures. By focusing on underbase strategies, adhesion reliability, and post-press care, you build a repeatable, scalable routine that minimizes misprints and edge lifting. In short, this approach to textile graphics blends technology and craft, offering a practical framework for designers and printers to experiment, troubleshoot, and improve results over time.
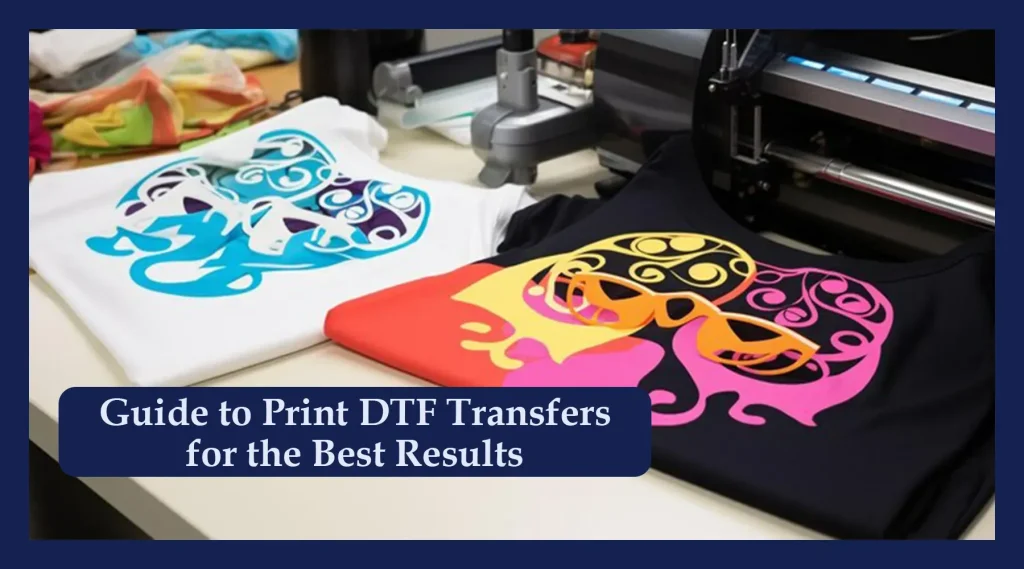
1) DTF Transfers for Hoodies and Tees: A Complete Start-to-Finish Guide
DTF transfers have transformed garment customization by delivering vibrant, durable designs across a wide range of fabrics. When you’re focusing on hoodies and tees, understanding the full scope of the DTF process—from concept to curation—helps ensure your results stand up to wear and washing. Using this approach, you’ll learn how to optimize color, texture, and flexibility so designs stay sharp on different blends and weights.
This guide introduces you to essential steps, including design preparation, printing, powder curing, pressing, and post-care. By following a structured workflow, you’ll gain practical insight into applying DTF transfers for hoodies and tees and build confidence in troubleshooting and refining your process for repeatable, professional results.
2) Designing and Preparing Artwork for DTF Transfers
Before you print, nail down artwork details because good design makes the rest of the process easier. Start with a high-resolution image (at least 300 dpi at final print size) and a color-managed workflow. For DTF transfers, you’ll typically work with a white underbase plus a color layer, especially on dark fabrics, to achieve vibrant reproduction.
In this phase, plan size and placement carefully, set clear margins, and manage color using sRGB for web-to-print consistency. Consider soft-proofing to anticipate shifts, and decide whether to mirror (often not required for DTF). If your design includes text, ensure legibility and consider converting text to outlines to avoid font issues during printing.
3) The DTF Printing Guide: Film, Powder, and Pre-Press Preparation
Printing is the heart of the DTF process. You print the image onto a special DTF film with a white underbase first, then the color layer. After printing, you apply adhesive powder and cure it so the powder adheres to the resin, forming a ready-to-transfer sheet that performs reliably on hoodies and tees.
Key steps include selecting the correct inkset and profiles for your DTF system, dusting the printed film with adhesive powder (amount matters for adhesion and texture), and curing the powder fully. Proper storage of cured transfers in a dry, dust-free environment helps maintain consistency for long runs.
4) Garment Preparation and Alignment for Optimal DTF Application
Preparation is critical to a smooth application. Pre-press to remove moisture and flatten the fabric helps the transfer adhere evenly and reduces warping. Hoodies and tees made from cotton or cotton blends generally yield the best results, though many poly blends also perform well.
Align the transfer carefully on the garment, using marks or a ruler to ensure straight placement. Pre-press with a silicone or Teflon layer to protect the surface, and consider a light test patch on a similar fabric before committing to a full print run.
5) Press Settings and Execution: Mastering Heat Press Temperatures for DTF
The press step is where the transfer fuses to the fabric. A practical starting point is 305-320°F (150-160°C) for 12-15 seconds. Thick hoodie fabrics may require a slightly longer press or higher pressure, but monitor closely to avoid scorching or scorching-like edges.
Apply firm, even pressure, ensuring the entire design area is engaged. For most DTF transfers, a cold peel yields consistent results as the film cools and the adhesive sets. Depending on film and powder, warm or hot peels may be appropriate—follow your transfer film and powder manufacturer’s guidance. Some designs benefit from a two-step approach: a light post-press after peeling to ensure full edge curing.
6) Post-Press Care and DTF Transfer Troubleshooting: Ensuring Longevity and Quality
After pressing, allow the garment to cool on a flat surface before handling to prevent shifting or edge stress. For washing, use a gentle cold-water cycle and air dry when possible to maximize durability. Long-term care strategies—turning the garment inside out, using mild detergents, and avoiding fabric softeners on printed areas—help preserve color vibrancy and adhesion.
DTF transfer troubleshooting is an ongoing practice. Common issues like edge lifting, color bleed, or white base showing through on light fabrics can be addressed by adjusting pre-press time, base opacity, or temperature settings. Documenting your process and maintaining a repeatable workflow across fabrics improves consistency and makes it easier to scale up projects while reducing misprints and adhesion problems.
Frequently Asked Questions
What are the essential steps in applying DTF transfers for hoodies and tees?
Key steps include designing for hoodies and tees, printing the white underbase and color layer on DTF film, applying adhesive powder and curing, preparing the garment (pre-press and alignment), pressing at the recommended temperature and time with firm, even pressure, and finishing with a cold peel and proper post-care guidance.
What heat press temperatures and times are recommended for DTF transfers?
A common starting point is 305–320°F (150–160°C) for 12–15 seconds. Adjust slightly for thicker fabrics like hoodies, keeping even pressure and a cold peel for most DTF transfers to ensure good adhesion and a flexible finish.
How do you troubleshoot common issues with DTF transfer applications?
DTF transfer troubleshooting covers edge lifting, color bleed, white base visibility, and stiffness. Solutions include ensuring thorough pre-press drying, fully curing the white underbase, correcting temperature/time/pressure, proper garment alignment, and performing a follow-up press if needed.
What should be included in a basic DTF printing guide for hoodies and tees?
A basic DTF printing guide should cover artwork prep (resolution and color management), printing sequence (white underbase then color), powdering and curing, garment prep, accurate alignment, appropriate press settings, peeling method, and post-care steps.
How can you ensure color accuracy and durability when applying DTF transfers?
Ensure color accuracy with a color-managed workflow (e.g., SRGB, soft-proofing), use a sufficiently opaque white base for dark fabrics, test on similar fabrics, and follow proper curing and post-care to maintain durability and vibrancy.
What post-care steps help extend the life of DTF transfers on hoodies and tees?
Allow the garment to cool completely after pressing, wash inside-out in cold water with a mild detergent, air dry or use low heat, avoid fabric softeners on the print area, and store in a dry environment to preserve adhesion and color strength.
| Stage / Key Point | Summary |
|---|---|
| Overview | DTF transfers enable vibrant, durable designs on hoodies, tees, and a wide range of fabrics. The guide covers prep, printing, pressing, post-care, tips, and troubleshooting to achieve professional results. |
| Step 1: Design prep and file setup | High-resolution artwork (at least 300 dpi), color-managed workflow; white underbase for dark fabrics; consider color management (sRGB) and soft-proofing; most workflows don’t require mirroring; ensure text is legible and outlines are used if needed. |
| Step 2: Printing and powder | Print the white underbase first, then the color layer on DTF film. Apply adhesive powder, cure it fully, and store cured sheets in a clean, dry place. |
| Step 3: Garment preparation | Choose garments (100% cotton or cotton blends preferred; test patches if unsure). Pre-wash/dry, pre-press to remove wrinkles/moisture, align transfer, and use a protective layer during pressing. |
| Step 4: Pressing | Typical settings: 305–320°F (150–160°C) for 12–15 seconds. Apply firm, even pressure. Use cold peel (often most consistent); a second optional post-press can improve adhesion on tricky designs. |
| Step 5: Post-press care | Let the garment cool completely, wash gently with cold water, air dry when possible, and turn inside out for longer-term care. Test on sample garments to refine care and adherence. |
| Troubleshooting & optimization | Common issues: edge lifting, color bleed, white base showing on light fabrics, stiff texture, or uneven adhesion. Fixes include adjusting pre-press steps, ensuring full cure, verifying color profiles, and confirming transfer film quality and pressure/temperature. |
| Advanced tips | Dark vs light fabrics needs, fabric variety considerations, standardized workflow for consistency, and proper storage (low humidity, dust-free) to maintain transfer quality over time. |
Summary
DTF transfers enable vibrant, durable designs on hoodies and tees, with a structured workflow from design preparation to post-care that supports reliable results across fabrics. The step-by-step process—design prep, printing and powder, garment prep, pressing, and post-press care—paired with troubleshooting and advanced tips helps achieve consistent, professional DTF transfers.