UV DTF transfer to garments is transforming how designers bring vibrant, durable prints to a wide range of fabrics. This method blends the flexibility of film-based transfers with the color fidelity of UV-curable inks, delivering sharp details on everything from T-shirts to hoodies. For anyone building an apparel line or pursuing DIY projects, mastering this technique unlocks bold designs that withstand washing and wear. In this guide, you’ll learn how to apply UV DTF transfer effectively and discover tips to optimize color, adhesion, and finish. You’ll also encounter related topics such as UV DTF transfer on garments, how to apply UV DTF transfer, DTF UV printing for apparel, garment decorating with UV DTF, and a practical UV DTF printing guide to keep you on track.
Viewed through different lenses, this technique is a UV-curable film transfer for textiles that bridges traditional screen printing with modern digital workflows. Instead of pigment inks, UV inks cure on the transfer and fuse to fabric under heat, yielding durable, high-detail images. This approach suits cotton, blends, and many poly fabrics, enabling faster production and broader garment options. A solid UV printing guide will emphasize artwork preparation, color management, proper pre-press, and calibrated heat-press parameters to ensure adhesion. For planners and artists, consider talking about UV-based garment decoration, digital UV transfers for apparel, and related concepts like UV-ink transfer techniques when mapping a project.
1. Understanding UV DTF transfer to garments: benefits, versatility, and equipment
UV DTF transfer to garments combines the flexibility of transfer films with the color fidelity of UV-curable inks. This method delivers bright, durable prints on a wide range of fabrics, from cotton tees to blends and certain synthetics, making it a versatile option for both small DIY projects and larger apparel runs.
The result is high color density, sharp detail, and a smooth finish that stands up to washing when heat-pressed correctly. For garment decorating with UV DTF, you gain a faster production cycle and less layering compared to traditional decorating methods, while still achieving professional-grade results on diverse garment types.
2. Essential tools and materials for UV DTF transfer on garments
Before you begin, gather the right tools to ensure consistent, repeatable results. A UV DTF transfer film, UV-curable inks, and a printer capable of handling UV inks are foundational materials, along with a heat press that offers precise temperature control.
Other indispensable items include a teflon sheet or silicone parchment for protection, a pre-press pad to smooth fabrics, alignment tape for precise placement, scissors for trimming, and a scale or pressure gauge to monitor consistent pressure. Having a dedicated workspace helps maintain cleanliness, accuracy, and quality throughout the UV DTF transfer process.
3. Preparing artwork and color management for UV DTF printing on apparel
Artwork should be high-resolution (at least 300 dpi) and color-managed to preserve fidelity when transferring to fabric. Convert files to the printer’s color space, often starting with a wide-gamut RGB workflow and finishing with a CMYK conversion suitable for the transfer media.
Create safe margins to avoid edge artifacts, separate color layers when working with photos or gradients, and use mock-ups to verify placement on the garment. Preparing the garment with a light pre-press helps remove moisture and reduces wrinkles, setting a stable canvas for the transfer.
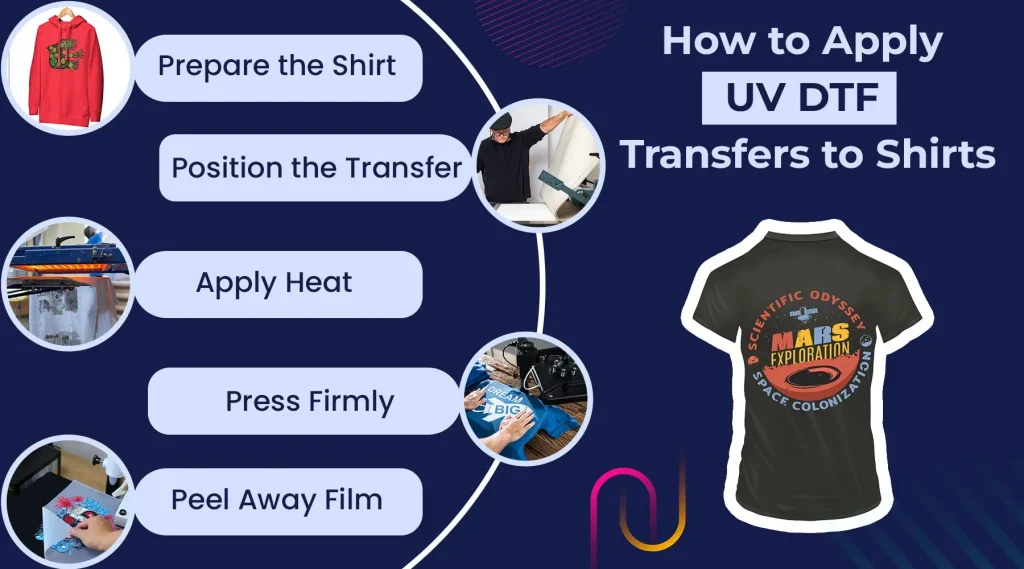
4. Step-by-step process: how to apply UV DTF transfer to garments
How to apply UV DTF transfer starts with printing the design onto the UV DTF transfer film according to your printer’s guidelines. Ensure your color profile and ink density are tuned for the transfer media to maximize color richness without oversaturation.
Next, cure or dry the printed film as required, trim excess edges for a clean sheet, and position the transfer on the garment using alignment marks. Pre-press to remove moisture, then apply heat and firm, even pressure at controlled temperatures (typically around 160–170°C / 320–340°F for 12–20 seconds). Peel the carrier either hot or cold according to the film, perform a post-press if needed, and allow the garment to cool completely.
5. Troubleshooting, quality control, and optimizing adhesion in garment decorating with UV DTF
Common issues include color mismatch, peeling edges, white halos, and cracking after washing. Revisit color management, recalibrate ICC profiles, and test with color targets to align hues before committing to production.
If edges lift, try longer dwell times or adjust pressure, and verify the garment fiber type. Use edge-tightening techniques to prevent halos and always follow wash recommendations to maintain durability. Keeping a log of printer settings, film types, and fabric materials helps you reproduce consistent results.
6. Post-press care, longevity, and best practices for UV DTF printing on garments
Proper care extends the life of UV DTF prints. Instruct customers to turn garments inside out, wash with cold or warm water, and avoid harsh detergents. Air-drying or tumble-drying on low heat helps preserve color and adhesion.
For longevity, store finished items away from direct sunlight and avoid ironing directly on the print. Document post-press care and any coatings or finishes used, and continue refining your process with a UV DTF printing guide to optimize color, adhesion, and durability across different fabrics.
Frequently Asked Questions
What is UV DTF transfer to garments and why is it a popular choice for garment decorating?
UV DTF transfer to garments uses UV-curable inks on a transfer film that is cured before transfer, delivering high color density, sharp details, and broad fabric compatibility (cotton, blends, polyester). It offers a relatively straightforward workflow, quicker production cycles, and durable results when heat-pressed correctly, making it ideal for reproducing logos, photos, or artwork on a wide range of garments.
How to apply UV DTF transfer to garments: a step-by-step overview.
1) Print the design onto UV DTF transfer film with proper color management. 2) Cure or dry the printed film as required by your system. 3) Trim excess film for a clean transfer sheet. 4) Align the transfer on the garment and secure with low-tack tape. 5) Pre-press the garment to remove moisture. 6) Apply heat and pressure (typical 160–170°C / 320–340°F for 12–20 seconds). 7) Peel the transfer hot or cold per film guidelines. 8) Optional post-press for 5–10 seconds. 9) Let the garment cool completely before handling.
What equipment and settings are required for a successful UV DTF printing guide?
Essential gear includes UV DTF transfer film with adhesive, UV-curable inks compatible with DTF, a UV-capable printer, or a dedicated UV DTF printer, and a heat press with accurate temperature control. You’ll also need a teflon sheet, alignment tape, a pre-press pad, scissors for trimming, and optional tools like a pressure gauge or pressing pillow. For best results, use color management practices and ICC profiles, create mock-ups, and test on similar fabrics before production.
What are the key benefits of garment decorating with UV DTF and how does it compare to traditional methods?
Benefits include vivid, high-contrast colors and sharp details, broad fabric compatibility (cotton, blends, polyester), a simpler workflow with fewer material layers, good durability when properly heat-pressed, and faster production cycles. This approach is a strong option for DTF UV printing for apparel and is especially effective for reproducing complex logos and photographs on a variety of garments.
What common issues can arise with UV DTF transfer to garments and how do I troubleshoot them?
Common issues include color mismatch, peeling edges, white halos, cracking after washing, and bleeding on dark fabrics. Troubleshooting tips: recalibrate color management and ICC profiles; increase dwell time or adjust pressure for better adhesion; ensure edge-clean designs to avoid halos; follow wash recommendations to prevent cracking; use appropriate white underbase or media designed for dark fabrics. Testing on scrap fabric before production helps dial in settings.
How should I care for UV DTF transfers on garments to maximize longevity post-press?
Care tips include turning garments inside out for washing, using cold to warm water, choosing a gentle cycle, and air-drying or tumble-drying on low heat. Avoid ironing directly on the print and use a protective sheet if needed. Store garments away from direct sunlight to prevent color fading. Providing customers with these post-press care guidelines helps maintain the look of UV DTF transfers on garments.
| Section | Key Points |
|---|---|
| Introduction | Step-by-step tutorials are invaluable for adopting new garment decoration techniques. UV DTF transfer to garments combines the flexibility of direct-to-film with UV-curable inks for bright, durable prints on many fabrics. This guide aims to help you elevate apparel projects by mastering practical, repeatable steps and tips for color, adhesion, and finish. |
| Understanding UV DTF transfer to garments | Defines UV DTF as using UV-curable inks on a transfer film, cured before or during transfer to fabric. Results in high color density, sharp details, and smooth finishes; suitable for white and colored fabrics; ideal for logos, photos, and artwork on apparel. |
| Key benefits | Vivid, high-contrast colors; broad fabric compatibility (cotton, blends, polyester); straightforward workflow with fewer layers; good durability with proper heat; faster production vs some traditional methods. |
| Materials and tools | UV DTF transfer film and adhesive, UV-curable inks, UV DTF printer or compatible printer, heat press with precise temperature control, teflon/silicone sheet, pre-press pad, alignment tape, scissors, scale/pressure gauge, pressing pillow, post-press care notes. |
| Preparing design/workspace | Use high-resolution (≥300 dpi) files; manage color with RGB workflow and CMYK conversion; maintain safe margins; separate color layers; mock-up placement; pre-press garment to remove moisture. |
| Step-by-step process (summary) | Print on transfer film; cure/dry as required; optionally trim edges; align transfer on garment; pre-press to reduce moisture; apply heat and pressure (typical 160–170°C for 12–20s); peel carrier (hot or cold per film); post-press if needed; cool completely. |
| Tips for best results | Calibrate heat press regularly; manage ink density to avoid oversaturation; use protection sheets; test on scrap fabric; keep transfer/garment dry; consider coatings after base transfer if used. |
| Common issues & troubleshooting | Color mismatch (recalibrate ICC), peeling edges (increase dwell/pressure), white halos (adjust edges), cracking after washing (wash instructions), bleeding on dark fabrics (use appropriate underbase or media). |
| Post-press care and longevity | Turn garments inside out for washing, use cold/warm water; gentle cycle; air-dry or low heat; do not iron directly on print; store away from direct sunlight. |
| Quality control and final tips | Inspect transfers for uniform color and adhesion; keep a printer/film/material maintenance log; maintain clean workspace to avoid dust. |
Summary
Conclusion: UV DTF transfer to garments offers a compelling blend of color fidelity, durability, and process simplicity for garment decoration. By following structured steps—from design preparation to precise heat and pressure control—you can achieve consistent, high-quality results on a variety of fabrics. Remember to choose the right transfer film, manage color with calibrated profiles, monitor heat settings, and test on similar fabrics before scaling production. With patience and attention to detail, UV DTF printing for apparel becomes a reliable method for creating standout garments that customers will love.