DIY DTF printing has opened a world of customization for hobbyists who want professional-looking apparel from home, offering a budget-friendly path to high-quality transfers without a full studio. This guide acts as a friendly entry point, especially for DTF printing for beginners, by outlining practical workflows, affordable gear, and troubleshooting tips that demystify color accuracy and setup, and budget-friendly options. You’ll get a clear overview of the DTF transfer process, including how to plan white underbases for dark fabrics, manage ink behavior, and predict how each layer will blend when cured, and tested for durability. We also cover a practical DTF printer setup with recommendations for maintenance, workflow organization, and safety considerations so you can start with a solid foundation without guesswork, with clear, labeled settings. As you plan projects, keep DTF printing materials and DTF design tips in mind to maximize vibrancy, durability, wash-fastness, and consistency across a range of fabrics.
From a terminology perspective, the same method is described as direct-to-film, a film-transfer approach that prints onto a release film before applying heat. This broader framing includes terms like film-based transfer, print-on-film workflows, and at-home heat-press setups to reflect how hobbyists search for guidance. Using these LSI terms helps you connect with related topics while staying true to the core DTF concept.
Getting Started with DIY DTF Printing: A Beginner’s Roadmap
DIY DTF printing opens a world of customization for hobbyists who want professional-looking apparel without a full studio. This beginner’s roadmap explains how the workflow comes together, from choosing designs to producing a transfer that can withstand wash and wear. For DTF printing for beginners, this guide clarifies terminology, steps, and expectations that help you start with confidence.
By focusing on the core stages—design, film printing, powdering, curing, and heat transfer—you’ll gain a practical sense of the DTF transfer process and what gear and prep are essential. This perspective builds a repeatable workflow you can refine over time.
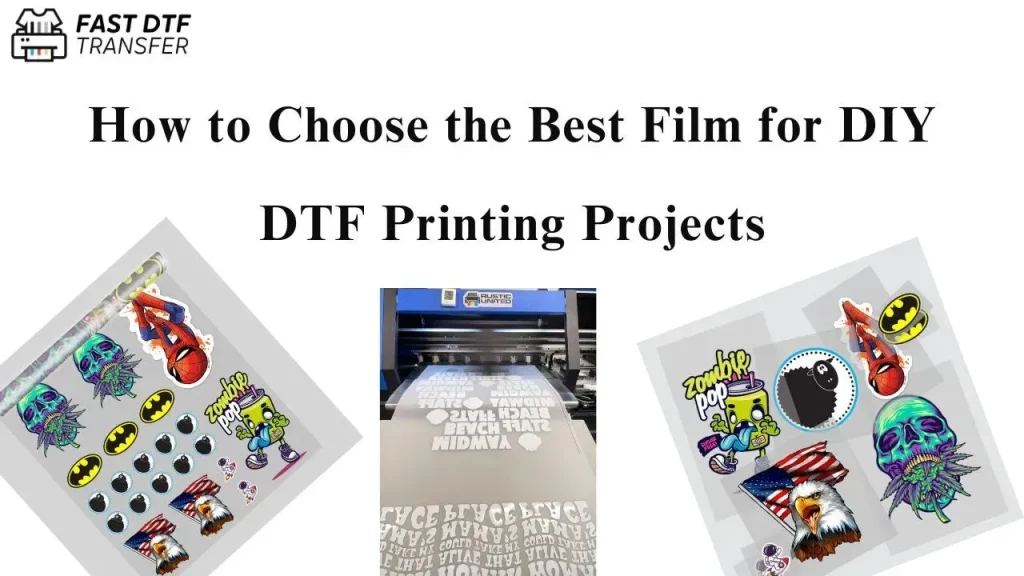
DTF Transfer Process Demystified: From Film to Fashion
A typical DTF transfer process starts with printing your design onto a special film, laying down a white underbase where needed to brighten colors on dark fabrics, then applying a powder and curing it before the final heat transfer. Understanding this path helps you anticipate how each layer affects color and durability.
Interpreting the transfer steps ahead of time supports better color management and fabric compatibility, whether you’re printing on cotton tees, blends, or synthetics. Knowing the process also informs your choice of materials and how to optimize the sequence for clean, vibrant transfers.
Selecting and Using DTF Printing Materials for Reliable Results
DTF printing materials form the backbone of your results. Expect a DTF printer with white ink capability, CMYK inks plus white, a DTF transfer film or PET film, powder, and a curing station or heat source. The right mix supports consistent results and easier troubleshooting.
When choosing supplies, prioritize compatibility with your fabrics, cost per print, and supplier support. Quality inks, appropriate films, and proper curing contribute to color fidelity, washability, and long-term durability across cotton, blends, and other substrates.
DTF Printer Setup and Calibration: Consistency You Can Trust
DTF printer setup starts with confirming your printer is capable of white ink and that the color profiles are tuned for the film you use. Regular maintenance, head cleaning, and proper film feeding are essential to minimize misfeeds and clogs while preserving accurate color reproduction.
Calibration steps include running test prints, aligning the film, and verifying white underbase strength on sample fabrics. Documenting your settings for different garment types helps you maintain a repeatable workflow and reduces guesswork during actual projects.
DTF Design Tips: Artwork that Transfers Bright and Clear
DTF design tips start with high-resolution artwork—aim for 300 dpi or higher—and thoughtful planning for a white underbase so colors stay bold on dark fabrics. Prepare clean color separations and preserve sharp edges by using vector or properly cleaned raster art.
Another key is readability and contrast: choose legible typefaces, plan for gradients, and test swatches to see how ink layers behave on your chosen fabrics. By aligning design intent with the transfer process, you maximize vibrancy and durability after heat pressing.
Common Pitfalls and Maintenance for Long-Lasting DTF Projects
Common issues like fading, ghosting, or powder not adhering often come from inconsistent curing, improper powder coverage, or misaligned transfers. Establish a routine that includes proper ventilation, regular equipment cleaning, and verifying your post-press care instructions to minimize these problems.
Sustained results come from maintenance and smart workflows: store inks and powders properly, keep the workspace tidy, and track performance over time. With a disciplined approach, you’ll improve throughput, reduce waste, and protect the investment in your DTF printing materials.
Frequently Asked Questions
DTF printing for beginners: what is DIY DTF printing and why is it beginner-friendly?
DIY DTF printing lets you create professional-looking transfers at home. For DTF printing for beginners, the process involves printing onto a special film with water-based inks, applying a white underbase when needed, dusting with powder, curing it, and transferring the image to fabric with heat and pressure. This modular workflow suits hobbyists because it uses approachable steps and works on a wide range of fabrics. With practice, you can produce vibrant, durable designs suitable for apparel and gifts.
DTF transfer process: what are the key steps in a typical DIY DTF printing workflow?
A typical DIY DTF transfer process starts with prepress and design prep, then printing the design onto the film with the white base where needed, followed by applying and curing a powder. After brushing off excess powder, the film is heat-transferred to the garment, and the transfer is finished with cooling and care steps. Following manufacturer guidelines for temperature, time, and film helps ensure color accuracy and durability.
DTF printer setup: what equipment do I need and how should I configure my setup for DIY DTF printing?
For DIY DTF printer setup, essential gear includes a DTF printer with white ink, CMYK inks, DTF transfer film, powder, a curing device, a reliable heat press, transfer tape, carrier sheets, and blank garments. Set up the printer according to the supplier’s recommended settings, ensure good ventilation, and keep a clean, organized workspace. Start with simple tests on swatches to dial in color, underbase strength, and transfer timing.
DTF printing materials: which inks, films, powders, and substrates should I choose for DIY DTF printing?
Key DTF printing materials are water-based CMYK inks plus white, a suitable DTF transfer film (or PET film), and a compatible powder with a curing option. Pair these with a heat press and appropriate garments. Choose inks, films, and powders that match your printer and fabric type, and test on sample fabrics to understand color, texture, and wash durability.
DTF design tips: what design considerations help achieve sharp, vibrant transfers in DIY DTF printing?
DTF design tips include using high-resolution artwork (300 dpi or higher), planning the white underbase effects for dark fabrics, and ensuring legible text. Use scalable vector graphics for sharp edges and proper color separations to account for how the white layer affects perceived color. Always test swatches to verify color, texture, and durability before final prints.
DTF transfer process troubleshooting: what common issues can arise and how can beginners fix them?
Common issues in the DTF transfer process include fading or dull colors, ghosting, powder not adhering, and peeling. Fixes include ensuring a strong white underbase, proper curing of the powder, thorough removal of excess powder, precise film alignment, and appropriate heat/time settings. Also test on similar fabrics, maintain equipment, and work in a ventilated area during curing.
| Topic | Key Points |
|---|---|
| What is DTF printing? | DTF stands for direct-to-film. In this workflow you print the design onto a special transfer film with water-based inks, applying a white underbase on dark fabrics when needed, then cure with powder and transfer the image to a garment using heat and pressure. Unlike direct-to-garment printing, DTF creates a transferable film, offering consistent color across light and dark fabrics, broader fabric compatibility, and a modular, beginner-friendly workflow. |
| Why hobbyists are drawn to DTF printing? | For hobbyists, DTF printing offers a friendly balance of cost, flexibility, and results. Upfront investment can be lower than some direct garment systems; it supports cotton, blends, and dark fabrics; it enables complex graphics without screen setup and helps practice color management and ink behavior across substrates. |
| Core gear and materials | A DTF workflow relies on beginner-friendly equipment and consumables: a DTF printer with white ink capability, water-based CMYK inks plus white, transfer film (PET or specialized film), powder and a curing device, a heat press, transfer tape and carrier sheets, and basic garments with prep supplies. |
| Design considerations | High-resolution artwork (300 dpi+), planning of the white underbase for dark fabrics, attention to edge clarity and color density, legible text after transfer, and color separation considerations so the white base affects perceived color correctly. |
| Understanding the DTF transfer process in practice | A typical workflow includes: prepress/design prep; printing on film (white underbase first for dark fabrics); powdering and curing; removing excess powder; heat transferring the film to fabric; cooling and finishing. |
| Selecting the right settings and workflow | Follow vendor guidelines, with emphasis on white underbase depth, color balance, powder curing consistency, and achieving even heat and pressure across the print. |
| Design tips for better DTF results | Use scalable artwork (vector), ensure proper color separation, test with swatches, choose readable typefaces, and plan for fabric variability. |
| Step-by-step beginner-friendly workflow | Step 1: Prepare artwork. Step 2: Load film and print with recommended settings. Step 3: Apply powder and cure. Step 4: Brush off excess powder. Step 5: Align film and press. Step 6: Peel carrier (warm or cold per guidelines). Step 7: Cool and care for the garment; clean and maintain the workspace. |
| Common issues and troubleshooting tips | Fading/dull colors: revisit white underbase and curing; ghosting: verify alignment; powder not adhering: check curing; peeling/cracking: ensure proper cooldown and fabric compatibility. |
| Maintenance, safety, and best practices | Keep the setup clean and ventilated; clean print head area; store inks/powders per guidelines; protect yourself with gloves/eye protection during handling of powders or hot presses. |
| Cost considerations and ROI for hobbyists | Upfront costs include a white-ink capable printer, powders, films, a heat press, and garments; ongoing costs cover consumables and maintenance; ROI grows with optimized workflow and smaller batch prints. |
| Getting started today: projects and resources | Start with simple designs on light and dark fabrics; build a small catalog; use tutorials and forums; practice to expand to more complex artwork. |
Summary
DIY DTF printing is a practical pathway for hobbyists to produce high-quality transfers across a range of fabrics. With a clear understanding of the transfer process, reliable equipment, and a repeatable workflow, you can achieve vibrant, durable prints while refining your craft. As you gain experience, designs will improve, production becomes more efficient, and confidence grows. Embrace experimentation, document outcomes, and keep practicing to turn DIY DTF printing into a rewarding hobby that blends creativity with hands-on skill.